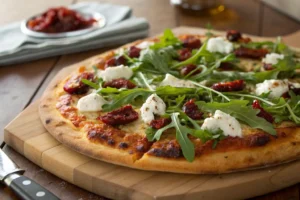
California pizza isn’t just food—it’s a culinary movement that redefined what pizza could be. Born out of creativity and the fusion of fresh, local ingredients with international flair, California pizza is more than crust and cheese. It’s a canvas for bold toppings like sun-dried tomatoes, goat cheese, arugula, and even smoked salmon. Whether you’re obsessed with crispy edges or gooey cheese pulls, this West Coast classic lets you bend the rules of traditional pizza in all the right ways.
If you’ve ever wanted to recreate the perfect California pizza at home—from scratch—this ultimate guide has everything you need. We’ll cover the essentials like making soft and chewy dough using a mixer dough machine, flattening it evenly with a dough sheeter, and sliding it perfectly into the oven with a pizza peel. But we’re not stopping there. You’ll learn how to use a pizza cutter like a pro, and we’ll show you some creative ways to work with shredded cheese—even if you don’t own a cheese grater.
You don’t need to be a chef to pull this off. Whether you’re using a crescent dough sheet or building your base from scratch, we’ll walk you through every step with the right tools, expert tips, and delicious ideas. Expect hands-on tutorials, must-have kitchen tools, and genius ways to make restaurant-level pizza in your own oven.
Don’t miss our expert kitchen tool picks and pizza tutorials to take your pizza game to the next level.
Ready to become your own pizza master? Let’s dig into the magic of California-style pies.
Jump to RecipeWhat Is California Pizza?
History and Origins of California Pizza
The roots of California pizza trace back to the late 1970s, when chefs like Wolfgang Puck and Ed LaDou disrupted traditional pizza norms by turning classic Italian pies into gourmet creations. What started in upscale Los Angeles kitchens quickly exploded into a nationwide trend. Instead of sticking with red sauce and mozzarella, these chefs layered dough with smoked salmon, goat cheese, roasted garlic, and arugula—ingredients unheard of on pizzas at the time.
This style of pizza carved its identity between Neapolitan tradition and modern West Coast innovation. It emphasized freshness, regional produce, and creativity. The dough? Light and airy. The toppings? Anything but basic. That bold departure from tradition laid the foundation for what we now celebrate as California-style pizza—a fusion-driven, ingredient-forward creation that redefined how pizza could look and taste.
Today, popular chains like California Pizza Kitchen (CPK) have made this gourmet, chef-inspired approach accessible to home diners, blending upscale flair with everyday convenience. But the spirit of California pizza isn’t limited to dining out—it thrives in home kitchens where people get creative with toppings and gear.
Looking for inspiration? Try our ultimate Blackstone grill ideas for crafting outdoor pizzas like a pro.
Why It’s Different from Other Styles (NYC, Chicago, Neapolitan)
Let’s set the record straight: California pizza doesn’t play by the rules. Unlike traditional styles—like Chicago’s deep-dish layers, New York’s foldable slices, or the blistered crusts of Neapolitan pies—California pizza breaks the mold, championing creativity, freshness, and a no-rules approach.
| Pizza Style | Crust Type | Signature Traits | California Twist |
|---|---|---|---|
| New York | Thin & Foldable | Chewy base, large slices | Uses lighter dough and bold toppings |
| Chicago Deep Dish | Thick & Buttery | Layered toppings, cooked in a pan | California skips the pan, goes flat |
| Neapolitan | Puffy Edges, Soft Middle | Wood-fired, minimalist toppings | California adds fusion, herbs, and texture |
| California | Medium-thin & Airy | Flexible, gourmet, farm-to-table | Reinvented each time you make it |
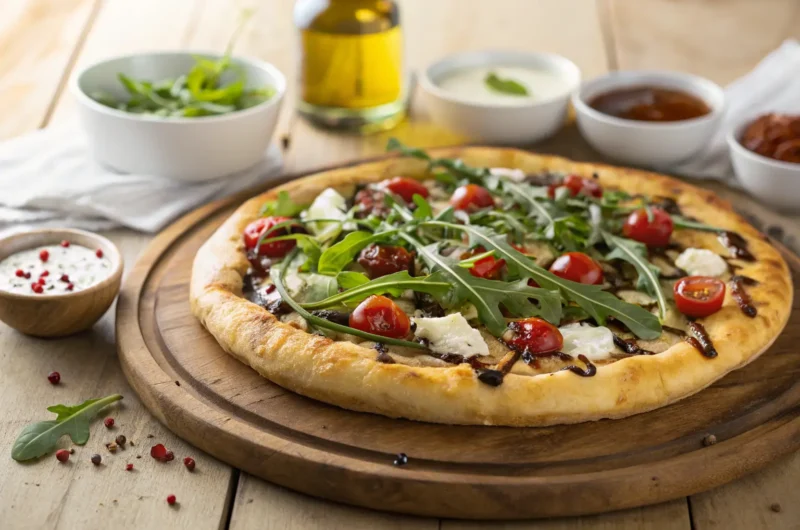
Where other styles stick to tradition, California pizza is an invitation to experiment—toss on grilled pineapple, layer with burrata, or even drizzle balsamic reduction. As long as the ingredients are fresh and the combinations creative, it’s fair game.
This flexible nature makes it ideal for the home cook who wants to use a mixer dough machine, flatten the dough with a dough sheeter, and top it with leftovers from last night’s salad or charcuterie board.
Check out our guide to creamy garlic chicken—a sauce twist that works surprisingly well on California pizza.
How to Make Authentic California Pizza at Home
Essential Dough Recipe: How to Mix, Knead, and Proof
At the heart of every irresistible California pizza is the dough—light, airy, and just chewy enough to hold bold toppings without being dense. Unlike traditional heavy bases, California-style crust leans artisan: handmade, fermented, and often enhanced with a touch of whole grain or olive oil for depth.
Start with this foundational dough recipe:
Ingredients:
- 3 ½ cups all-purpose or 00 flour
- 1 tsp sea salt
- 1 tbsp olive oil
- 1 tsp sugar
- 1 packet (2¼ tsp) active dry yeast
- 1 ¼ cups warm water (around 110°F)
Instructions:
- Activate the yeast: Mix warm water and sugar, then add yeast. Let it foam (5–10 minutes).
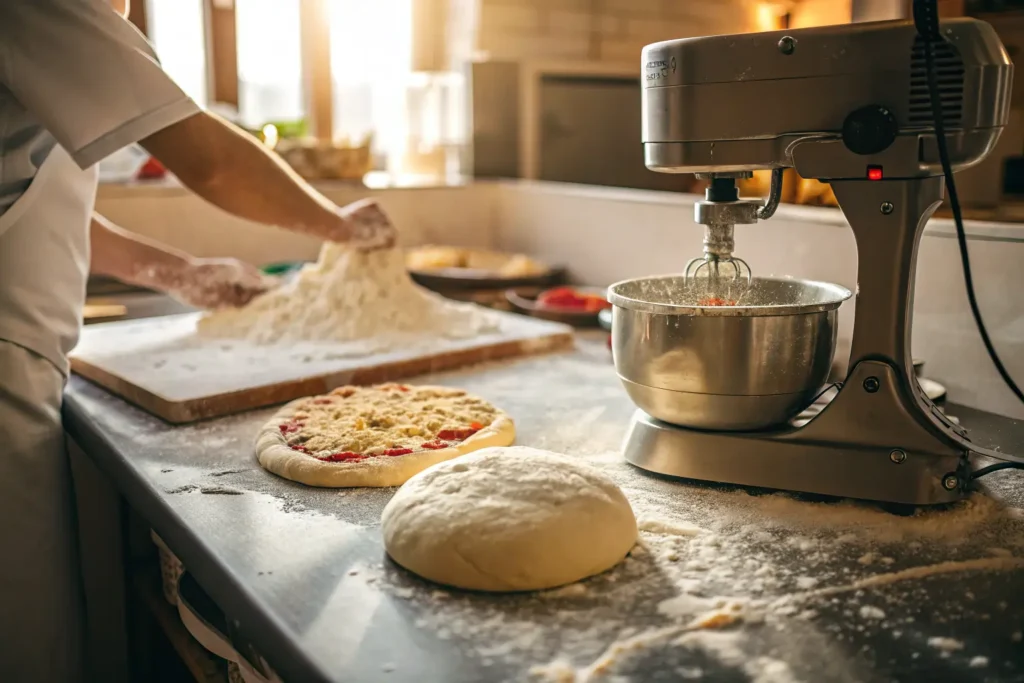
- Mix the dough: Combine flour and salt, pour in yeast mixture and olive oil. Use a mixer dough machine with a dough hook on low for 8 minutes or knead by hand for 10.
- First rise: Transfer the dough to an oiled bowl, cover it, and let it rise at room temperature until doubled—about 1 to 1.5 hours.
- Cold ferment: For better flavor, refrigerate for 12–24 hours after the first rise.
- Allow the dough to rest at room temperature until fully relaxed before shaping it with a dough sheeter or rolling pin—this ensures smoother stretching, better elasticity, and a crust that bakes evenly every time.
Discover great ideas like this smooth dough process in our Greek yogurt smoothie method—where technique and timing matter.
The mixer dough tool makes all the difference for beginners and pros alike.It ensures uniform gluten formation, minimizes the risk of over-kneading, and significantly reduces prep time—making your dough both reliable and efficient to work with. It’s a must-have for anyone serious about homemade pizza.
Choosing the Right Ingredients: California-Style Toppings and Sauces
Where traditional pizza relies on red sauce and mozzarella, California pizza is defined by freedom. Here’s how to choose your ingredients to reflect the West Coast spirit:
Base Sauces
- Garlic-infused olive oil – a light, flavorful option
- Pesto – for herbaceous, nutty richness
- White sauce or béchamel – ideal for veggie pizzas
- Hummus or tapenade – great for Mediterranean-style twists
Cheese
- Goat cheese, feta, ricotta, burrata, or smoked mozzarella
- Use a cheese grater or alternative methods like a food processor for perfect texture
Vegetables & Greens
- Sun-dried tomatoes, caramelized onions, artichokes, zucchini, mushrooms, roasted garlic
- Fresh greens like arugula, baby spinach, and basil added after baking for flavor contrast
Proteins
- Grilled chicken, prosciutto, pancetta, shrimp, or tofu
- Smoked salmon with dill is a California classic
Finishing Touches
- Balsamic glaze, truffle oil, red pepper flakes, microgreens
- Thinly shaved Parmesan adds a savory finish—achieve perfect, even flakes using a rotary cheese grater for optimal texture and flavor distribution.
The magic is in combining local, seasonal ingredients with gourmet flair. You’re not just throwing toppings on a crust—you’re building flavor in layers. Keep it light, fresh, and colorful.
Don’t miss our caramel macchiato recipe guide—a great pairing for your artisan pizza night.
California pizza thrives on the idea that pizza can be as diverse and creative as the people who make it. With the right dough foundation and fresh toppings, your home kitchen becomes the best pizzeria in town.
2025 California Hot Pizza : How to Make Artisan Pies Like a Pro at Home
Course: DinnerCuisine: California, American FusionDifficulty: Easy to Medium2
servings15
minutes10
minutes200
kcalLight, airy, and packed with flavor—this homemade California pizza dough is the perfect base for artisan-style pizzas. Easy to mix, proof, and shape, it delivers the crispy edges and soft bite that define authentic California-style crusts. Ideal for bold toppings and gourmet creations!
Ingredients
3 ½ cups all-purpose or 00 flour
1 tsp sea salt
1 tbsp olive oil
1 tsp sugar
2 ¼ tsp active dry yeast (1 packet)
1 ¼ cups warm water (about 110°F)
Directions
- Activate Yeast: In a small bowl, mix warm water and sugar. Stir in yeast and let it sit for 5–10 minutes until foamy.
- Mix Dough: In a large mixing bowl (or stand mixer), combine flour and salt. Pour in yeast mixture and olive oil. Mix until combined.
- Knead: Use a dough hook in a mixer on low, then medium for 6–8 minutes. Or knead by hand for 10 minutes until smooth and elastic.
- First Rise: Transfer to a lightly oiled bowl. Cover with plastic wrap or a towel and let rise at room temperature for 1 to 1.5 hours.
- Cold Ferment (Optional): For more flavor, place the dough in the fridge for up to 24 hours after the first rise.
- Rest & Shape: Bring the dough to room temperature before shaping with a dough sheeter or rolling pin.
- Bake: Preheat oven to 475°F with a pizza stone or steel. Top as desired and bake 10–12 minutes until crust is golden and crisp.
Notes
- 🍕 Pro Tips:
- Use a mixer dough machine for consistent kneading
- Dust your pizza peel with cornmeal for smooth transfer
- For bold California flavor, finish with fresh arugula, goat cheese, or a balsamic glaze
Dough Perfection – Mixer Dough vs. Manual Mixing
Why Use a Dough Mixer: Benefits and Techniques

When it comes to achieving a consistently soft, airy crust—the hallmark of California pizza—the way you mix your dough matters. While hand-kneading offers control, using a dough mixer unlocks next-level consistency, structure, and speed.
A high-quality dough mixer ensures uniform hydration, builds gluten networks evenly, and prevents the common issues of under-kneading or overworking. It streamlines the process and delivers results that rival professional kitchens—especially critical for California-style crust, which thrives on lightness and elasticity.
Here’s why using a mixer dough machine is a game-changer:
- Even Gluten Development: Balanced mixing develops gluten strands evenly, making your dough pliable and easy to stretch.
- Time Efficiency: What takes 10+ minutes by hand takes 6–8 minutes in a mixer.
- Hands-Free Precision: Set the speed, let it work, and focus on preparing toppings or sauces.
- Better Fermentation: A well-mixed dough ferments more effectively, boosting flavor and rise.
- Cleaner Process: Reduces flour dust and sticky countertops—ideal for home pizza sessions.
Learn more about kitchen efficiency in action from our creamy garlic chicken process—where timing, prep, and tool use all come together for delicious results.
Pro Tip :
Always use the dough hook attachment. Begin mixing on a low speed to gently combine the ingredients, then shift to medium speed for 5 to 6 minutes to develop a strong gluten structure and achieve a smooth, elastic dough ideal for California pizza crust. Take your time—use the windowpane test as a guide: stretch a small piece of dough until it becomes thin and translucent without tearing, a clear sign your gluten is fully developed.
Mixer Dough Settings and Dough Hydration Tips
Hydration levels are a key factor in defining crust texture—getting the right water-to-flour ratio directly impacts how light, airy, or chewy your California pizza base turns out. For California pizza, the ideal hydration level is between 65%–70%, creating a moist, workable dough that bakes with a crisp bottom and a soft bite.
| Hydration Level | Texture Outcome | Recommended Use |
|---|---|---|
| 60% | Denser, tighter crumb | Thin, crispy pizza styles |
| 65%–70% | Light, airy, open crumb | Ideal for California-style pizzas |
| 75%+ | Very wet, artisan breads | Requires high-skill shaping |
Using a dough mixer makes managing hydration easier, especially when using whole grains, semolina blends, or olive oil-based recipes common in California-style pizza.
Mixer Settings Cheat Sheet:
- Speed 1: Combine ingredients
- Speed 2–3: Knead and build gluten
- 5–7 minutes: Optimal mixing time for soft, stretchable dough
Once mixed, let the dough ferment slowly, either at room temperature for a few hours or overnight in the fridge. Then, bring to room temperature before pressing it out using a dough sheeter or by hand-stretching on a lightly floured surface. This rest phase relaxes the gluten, making the dough easier to shape and less likely to snap back or tear.
Check out our caramel macchiato tutorial to see how prep timing impacts flavor and texture—just like in pizza dough.
Using a mixer dough machine not only simplifies the process but also enhances the final product—delivering a pizza base that’s pillowy, balanced, and ready to carry bold California-style toppings.
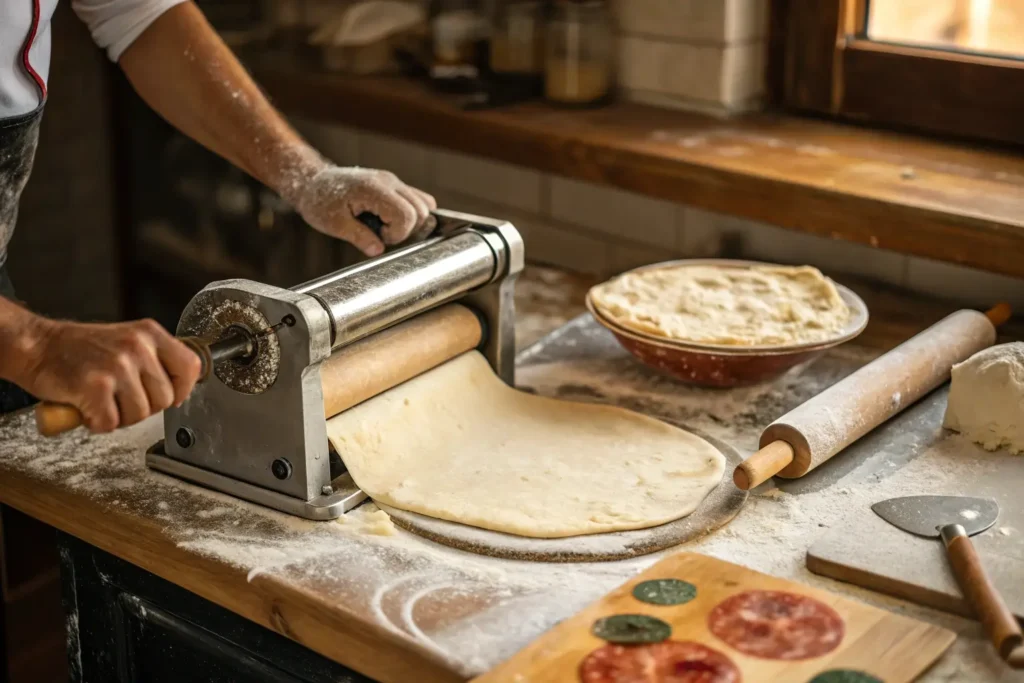
Flatten It Like a Pro – Using a Dough Sheeter
What Is a Dough Sheeter and How It Helps Pizza Making
When aiming for that perfect California-style crust—thin in the center, slightly crisp at the bottom, and beautifully uniform—a dough sheeter becomes your secret weapon. Unlike rolling pins that rely on uneven manual pressure, a dough sheeter flattens your pizza base with precision, speed, and consistency.
Whether you’re making one pizza or prepping for a crowd, a dough sheeter allows you to control thickness and shape with ease. It’s ideal for creating bases that cook evenly, retain air bubbles for texture, and don’t buckle under generous toppings—a hallmark of California pizza.
Key Benefits of Using a Dough Sheeter:
- Uniform Thickness: No more patchy spots—get an even crust every time.
- Time Saver: Sheet dough in seconds, freeing you up to focus on toppings.
- Improved Crust Texture: Evenly rolled dough bakes better, creating that perfect California chew.
- Professional Finish: Achieves pizzeria-level results right in your kitchen.
This tool pairs perfectly with a mixer dough machine, especially after cold fermentation. After allowing your dough to fully rest and come to room temperature, run it through the dough sheeter to achieve a perfectly even shape and consistent thickness—ideal for crafting a well-structured California pizza base.
Discover great ideas like this streamlined kitchen technique in our Greek yogurt smoothie guide—precision and balance are key in both recipes and prep.
Manual vs. Electric Dough Sheeter: Which Should You Use at Home?
Choosing between a manual and electric dough sheeter depends on your frequency of use, kitchen space, and budget—but both are powerful allies in California pizza making.
Manual Dough Sheeter
- Pros: Affordable, compact, easy to clean
- Best for: Occasional home use or small kitchens
- Ideal Use: Home chefs wanting more control over the process
Electric Dough Sheeter
- Pros: Fast, consistent, requires less physical effort
- Best for: Frequent bakers or batch prep
- Ideal Use: Larger families, pizza parties, or small food businesses
| Feature | Manual Sheeter | Electric Sheeter |
|---|---|---|
| Speed | Slower, hands-on | Rapid, automatic feed |
| Precision | Good with practice | High, even on first try |
| Cost | Budget-friendly | More expensive |
| Kitchen Space | Minimal | Requires countertop space |
No matter which one you choose, the goal is the same: a clean, flat dough canvas ready to carry the bold, layered flavors that define California pizza—from arugula and goat cheese to roasted veggies and truffle oil.
Looking for inspiration? Elevate your California pizza by topping your evenly sheeted dough with our rich, creamy garlic chicken—where silky sauce meets crisped crust for an unforgettable flavor combo
Using a dough sheeter elevates your pizza-making workflow. It guarantees the base of your California pizza is smooth, structured, and optimized for toppings—no tearing, no guesswork, just perfect results every time.
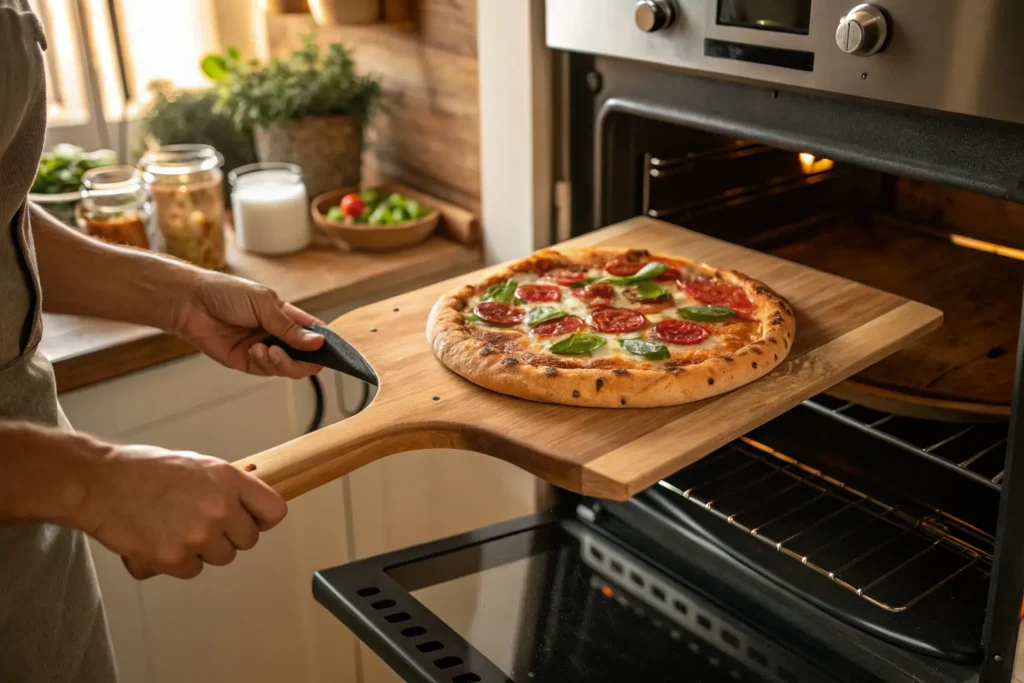
Pizza Peel Mastery – Slide It Right
What Is a Pizza Peel and Why You Need One

If you’ve ever struggled to slide your uncooked pizza onto a hot stone without destroying the shape—or watched helplessly as toppings tumbled into your oven—you need a pizza peel. It’s not just a tool; it’s a pizza essential. For anyone crafting California pizza at home, the peel is your bridge between prep station and oven floor.
A pizza peel is a flat, paddle-like board designed to transfer pizza to and from a hot oven. Crafted from durable wood or sleek metal, the pizza peel lets you smoothly transfer your pizza in and out of the oven—protecting the delicate crust, keeping toppings intact, and preventing burns during the process.
Why Every Home Pizza Maker Needs a Peel:
- Preserves Dough Shape: Prevents tearing and stretching when transferring delicate dough.
- Supports Even Baking: Lets you position your pizza directly onto a preheated stone or steel for that crisp, California-style bottom crust.
- Safe and Efficient: Keeps your hands away from hot surfaces while ensuring a smooth slide-in and pull-out.
- Perfect for Thin Crusts: Especially helpful when working with ultra-soft, well-hydrated dough like that used in California pizza.
Wooden peels are great for launching raw dough, while metal peels excel at retrieving hot pizzas. The slight bevel at the edge of the peel lets it slip under the crust without disturbing its structure.
Check out our ultimate Blackstone pizza grilling guide—where tools like the pizza peel make all the difference outdoors too.
How to Use a Pizza Peel Without Making a Mess
Using a pizza peel might look easy, but it takes a bit of technique—especially when handling fresh, delicate dough loaded with toppings. One wrong move and your pizza folds, sticks, or collapses mid-transfer. Here’s how to get it right every time:
Step-by-Step: Mastering the Pizza Peel Transfer
- Dust the Peel: Lightly coat with semolina or cornmeal. This acts like ball bearings, helping the dough glide.
- Work Quickly: Don’t let the dough sit too long or it’ll absorb the flour and stick.
- Test the Slide: Before transferring, gently shake the peel to ensure the pizza moves freely.
- Use a Confident Motion: Slide the pizza onto the hot stone or steel in a single, quick push.
- Retrieve with Metal: Once baked, use a metal peel to scoop the pizza cleanly and safely.
Pro Tips:
- Prep your pizza directly on the peel to avoid transferring it later.
- Keep the peel dry and cool—moisture increases sticking.
- If you’re using high-hydration mixer dough, be extra generous with flour underneath.
Using a pizza peel effectively is one of those small details that separates amateur pizza attempts from true California pizza artistry. With practice, you’ll feel the difference in how easily your crust holds its shape and how evenly it bakes.
Don’t miss our caramel macchiato pairing guide—a smooth sip to go with your crispy pizza perfection.
The pizza peel might be a simple tool, but mastering it turns pizza night into a seamless, stress-free experience. And for the California-style crust—thin, tender, and flavor-forward—it’s non-negotiable.
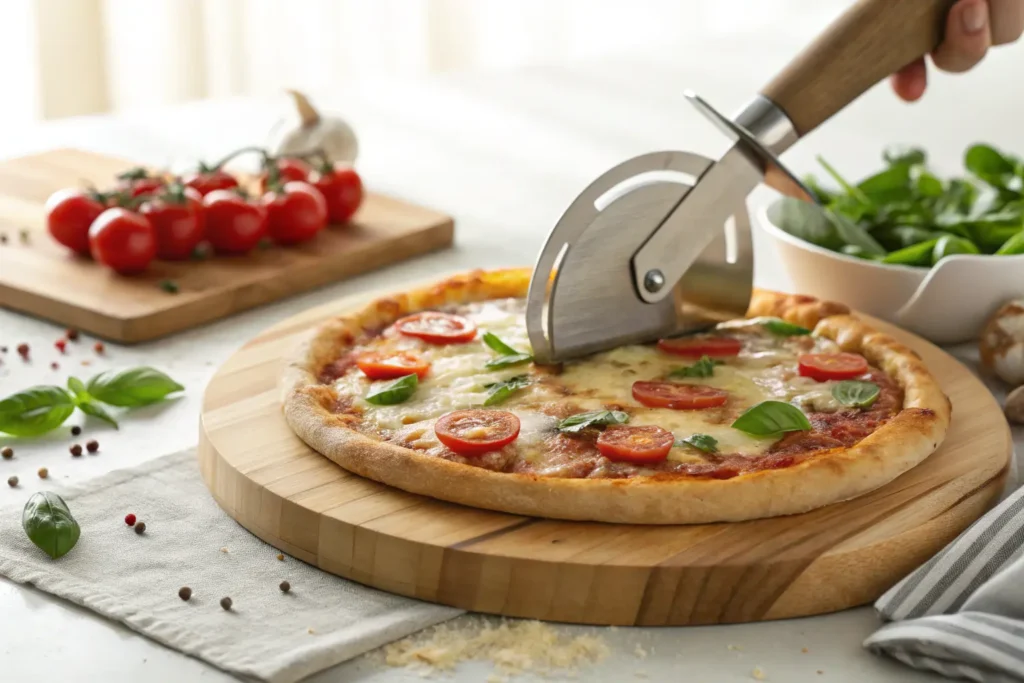
Sharp Slices – Best Practices with a Pizza Cutter
Types of Pizza Cutters (Wheel, Rocker, Scissors)
You’ve crafted the perfect California pizza—with a light, airy crust, fresh toppings, and bold flavor. But when it comes time to serve, the wrong tool can ruin the presentation in seconds. A dull or inappropriate cutter can drag toppings, smash the crust, or leave you with uneven slices. That’s where the right pizza cutter makes all the difference.
There are three main types of pizza cutters, and each has a unique advantage depending on your crust style, cutting surface, and comfort level.
1. Wheel Pizza Cutter
- Most common type, featuring a rotating blade that rolls across the pizza.
- Ideal for thinner California-style crusts where a quick, smooth cut is needed.
- Lightweight and easy to control, but requires some pressure for dense toppings.
2. Rocker Blade
- Large curved blade with handles on both ends—like a mezzaluna knife.
- Great for slicing in one smooth, rocking motion.
- Offers better leverage and cleaner cuts, especially for pizzas with thick or uneven toppings.
3. Pizza Scissors
- Specially engineered kitchen shears tailored for pizza cutting, these scissors often feature a built-in slicing base to support the crust and deliver clean, precise cuts.
- Best for soft, delicate crusts where pressing might crush the base.
- Handy for serving on trays or cutting custom slice sizes for guests.
Each type of pizza cutter serves a purpose in the home kitchen arsenal, but for California pizza, a sharp wheel or a rocker blade is usually ideal—clean, fast, and efficient.
How to Sharpen and Maintain Your Pizza Cutter
A dull cutter isn’t just ineffective—it can destroy a perfectly baked pizza by dragging cheese, tearing crust, and smudging toppings. That’s why regular maintenance of your pizza cutter is critical, especially when dealing with artisan-style pies like California pizza, where texture and appearance matter.
Tips to Keep Your Pizza Cutter Razor Sharp:
- Clean Immediately After Use: Prevent cheese and sauce from drying on the blade. Using warm water and a gentle sponge is typically all you need to effectively clean the blade without damaging its sharp edge.
- Sharpen Regularly: Use a handheld sharpener, honing rod, or even a whetstone to maintain the blade’s edge—especially for wheel-style cutters.
- Avoid Dishwasher Use: High heat and detergents dull blades faster and damage the cutter’s mechanics over time.
- Check Alignment: Make sure the blade rotates smoothly and doesn’t wobble. Misaligned wheels can cause jagged cuts.
- Store Properly: Use blade covers or hang the cutter to avoid dulling it against other utensils.
Looking for inspiration? Try pairing your pizza night with our bruschetta appetizers—cutting perfection continues with every course.
Proper slicing is more than just aesthetics—it affects the eating experience. Sharp edges make every bite cleaner, especially on California-style crust where the contrast between soft centers and crisp edges is key. A dull blade can crush that balance.
Investing in a quality pizza cutter and caring for it is just as important as choosing your ingredients or using a dough sheeter. When it comes to homemade pizza perfection, every tool matters.
Cheese Game Strong – Graters and Alternatives
Best Cheese Graters for Pizza (Manual vs. Rotary vs. Electric)

In the world of California pizza, cheese isn’t just a topping—it’s a texture, a flavor enhancer, and a visual layer that ties everything together. From creamy mozzarella to sharp Parmesan, cheese plays a starring role, and the way you grate it can dramatically affect your pizza’s finish.
A quality cheese grater ensures smooth melting, consistent coverage, and even baking. Whether you’re using fresh mozzarella, aged gouda, or shaved parmesan, the right grating method helps you achieve the perfect bite every time.
Let’s break down the top types of cheese graters every home pizza-maker should consider:
Manual Cheese Graters
- Classic box or flat graters with multiple blade sizes.
- Great for versatility: coarse, fine, and ribbon grating.
- Ideal for semi-soft cheeses like mozzarella or Monterey Jack.
- Lightweight and affordable.
Rotary Cheese Graters
- Crank-style graters with internal blades—great for Parmesan and hard cheeses.
- Offers quick, uniform shreds with minimal effort.
- Protects your fingers by creating a safe distance from the blade during use, minimizing the risk of accidental cuts while grating.
- Perfect for tableside garnishing on California-style pizza.
Electric Cheese Graters
- High-efficiency tools for bulk grating.
- Perfect for quickly prepping mozzarella, cheddar, or plant-based cheese alternatives in large, consistent batches.
- Best suited for large batches, pizza parties, or frequent cooks.
- Reduces wrist strain and speeds up prep time.
Explore our top kitchen tool picks to enhance every step of your pizza-making journey—from gourmet toppings to precision equipment.
No matter which type of cheese grater you choose, make sure it’s sharp and clean. Dull blades mash rather than shred, leading to clumping and uneven melting.
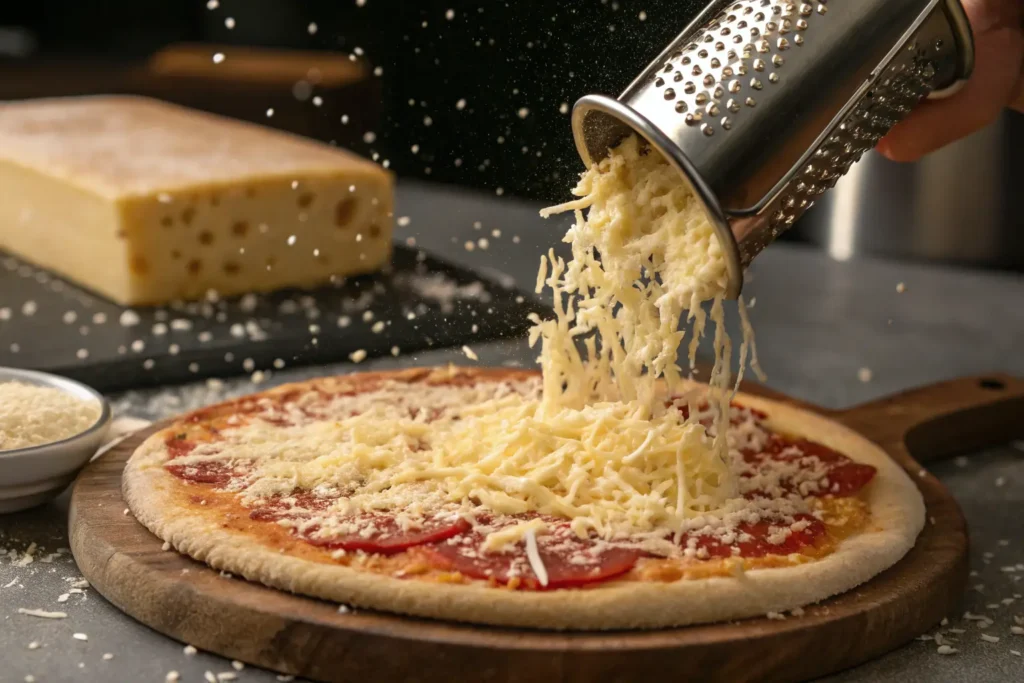
Smart Ways to Shred Cheese Without a Grater: Ingenious Kitchen Hacks
If you don’t own a traditional cheese grater, don’t panic. There are several smart kitchen hacks to help you shred cheese effectively and still enjoy a full-flavored California pizza at home.
1. Use a Vegetable Peeler
- Glide a vegetable peeler along the surface of a cheese block to produce delicate, ribbon-like slices ideal for topping pizzas.
- Great for Parmesan or hard cheeses.
- Ideal for finishing touches before or after baking.
2. Food Processor
- Use the shred blade to grate blocks of cheese quickly.
- Produces consistent texture and saves time.
- Ideal for preparing large quantities of mozzarella or cheddar.
3. Sharp Knife + Cold Cheese
- Chill the cheese block for 10–15 minutes.
- Slice the cheese into fine shavings or slender matchsticks using a sharp chef’s knife for clean, uniform pieces.
- Ideal for slicing semi-firm cheeses such as provolone or gouda, where structure and texture are easier to control.
4. Mandoline Slicer
- Adjustable thickness settings let you control cheese slice size.
- Excellent for layered pizzas and gourmet toppings.
5. Fork Shredding (Soft Cheese Only)
- For cheeses like goat cheese or brie, use a fork to gently pull and crumble.
- Adds rustic texture perfect for California-style pizza combinations.
These alternatives prove that even without a classic cheese grater, you can still achieve professional-level pizza results right at home. What matters most is consistency—uniform shreds melt evenly, bake beautifully, and deliver that gooey, satisfying finish that defines the best California pizza.
Check out our Greek yogurt smoothie recipe—another example where texture makes all the difference.
When it comes to topping your California pizza, how you handle your cheese is just as important as what you choose. A reliable cheese grater—or a creative substitute—ensures every bite delivers on texture, flavor, and that mouthwatering melt.
Basic Equipment to Make California Pizza at Home
Top 5 Must-Have Tools for Homemade California Pizza
Crafting perfect California pizza isn’t just about ingredients—it’s about having the right equipment that helps you nail consistency, flavor, and visual appeal every single time. These tools turn your kitchen into a pizza lab, giving you the confidence and control to bake restaurant-quality pies at home.
Here are the five essential tools every home pizza lover should own to bring authentic California-style pizza to life:
1. Dough Mixer
If you’re serious about pizza, a mixer dough machine should be your first investment. It simplifies the kneading process while ensuring your dough reaches optimal gluten development—critical for that airy yet structured California pizza crust.
Use Case:
Combine flour, water, salt, yeast, and olive oil, then knead on medium for 5–6 minutes. Let it rise, and you’re ready to roll (or sheet).
2. Dough Sheeter or Rolling pin
Achieving the ideal base thickness is key to California-style pizza. A dough sheeter makes it easy to roll dough evenly, resulting in a light, crispy bottom without overworking the gluten.
Use Case:
After cold fermentation, rest the dough, then run it through the sheeter to get a uniform round base with perfect thickness and edge definition.
3. Pizza Peel
Transferring your pizza to a blazing hot stone or oven rack can be stressful—but a pizza peel eliminates the risk of warping crusts or losing toppings. It’s essential for precision and safety.
Use Case:
Load the prepped pizza onto a floured wooden peel, then slide it confidently into the oven for perfect positioning and no sticking.
4. Pizza Cutter
Once your pizza is golden and bubbling, a sharp pizza cutter helps you slice cleanly through toppings and crust without dragging the layers apart.
Use Case:
Use a rocker blade or rotary wheel to make even slices, especially useful for soft crusts with gourmet toppings like arugula or goat cheese.
5. Cheese Grater
Whether you’re grating mozzarella, gouda, or aged parmesan, a reliable cheese grater ensures that your cheese melts evenly and looks restaurant-quality.
Use Case:
Grate fresh cheese just before baking to avoid clumping. Opt for a rotary grater when working with firm cheeses like Parmesan for fine, even shavings, and switch to a box grater when you need larger quantities or coarser textures for generous cheese coverage.
How to Use Each Tool Effectively
| Tool | Primary Function | Pro Tip for California Pizza |
|---|---|---|
| Dough Mixer | Kneads dough to ideal elasticity | Use medium speed for 6 minutes max |
| Dough Sheeter | Rolls dough evenly for perfect base | Dust with flour to prevent sticking |
| Pizza Peel | Transfers pizza into and out of oven | Use cornmeal for smooth sliding |
| Pizza Cutter | Slices cooked pizza cleanly | Wipe blade between cuts for neat slices |
| Cheese Grater | Preps cheese for optimal melt | Chill cheese first for better grating |
Explore our guide to creamy garlic recipes here—tools make a difference across every kitchen creation.
Having the right gear takes your California pizza from average to artisan. Each of these tools plays a specific role in building the crust, preserving the toppings, and delivering that signature flavor-packed bite. When used together, they turn your kitchen into a creative pizza studio where every step leads to the perfect slice.
Creative Pizza Recipes with Crescent Dough Sheet
What to Make with Crescent Dough Sheet (Beyond Pizza)
While traditional California pizza dough is made from scratch using a mixer dough and sometimes rolled out with a dough sheeter, not every pizza night requires hours of prep. Enter the crescent dough sheet—a store-bought shortcut that offers flaky layers, buttery flavor, and unbelievable versatility for quick, delicious meals.
Crescent dough is pre-rolled, pliable, and rises beautifully in the oven, making it a fantastic canvas for both savory and sweet pizza creations. If you’re short on time but still want bold flavor and artisan presentation, this dough delivers.
Why Crescent Dough Works for California Pizza:
- Soft and flaky texture mimics layered pastry crust
- Cooks quickly—perfect for busy weeknights or last-minute guests
- Neutral flavor complements both creative toppings and classic combos
- Customizable shapes: squares, pinwheels, rolls, or full-size pies
Looking for inspiration? Try our bruschetta appetizer guide for ideas you can convert into flatbread-style pizzas using crescent dough.
Mini Flatbreads, Pizza Rolls, and Quick Tarts with a California Twist
Here’s how to turn crescent dough sheets into a variety of California pizza-inspired dishes that are fast, fun, and loaded with West Coast flair:
1. Arugula & Goat Cheese Flatbreads
- Flatten the dough into your desired shape, lightly coat the surface with garlic-infused oil, and bake until it turns golden brown and crisp.
- Top with arugula, goat cheese, caramelized onions, and a balsamic glaze drizzle.
2. Smoked Salmon Pizza Tarts
- Cut dough into squares, fold edges slightly. Bake partially, then top with cream cheese, smoked salmon, capers, and fresh dill.
3. Veggie Pizza Pinwheels
- Layer sautéed mushrooms, spinach, and mozzarella. Roll into a log, slice into spirals, and bake for a handheld California-style pizza bite.
4. BBQ Chicken Crescent Pizza
- Spread BBQ sauce, top with grilled chicken, red onion, and cheddar. Bake and finish with cilantro for that fusion-flavor signature.
5. Sweet & Savory Pear-Gorgonzola Squares
- Use crescent dough as a tart base. Add sliced pears, gorgonzola crumbles, and chopped walnuts. Drizzle with honey post-bake for a bold contrast.
These recipes not only expand your California pizza repertoire but also showcase how versatile crescent dough sheets can be. They’re especially great for experimenting with seasonal produce and trending flavor profiles.
Don’t miss our creamy flavor ideas like this garlic chicken—a rich topping option even on crescent dough bases.
Pro Tips for Using Crescent Dough in Pizza Recipes:
| Tip | Why It Matters |
|---|---|
| Keep Dough Cold | Easier to handle and shape without tearing |
| Pre-Bake Lightly | Helps avoid soggy crust with wetter toppings |
| Use a Pizza Cutter | Clean slices protect presentation and layering |
| Add Finishing Touches After Baking | Arugula, drizzles, and cheese shavings stay fresh |
Whether you’re in a rush or looking for creative ways to entertain, crescent dough sheets provide a buttery, flaky base that pairs perfectly with bold California toppings. It’s not just a shortcut—it’s a secret weapon for weeknight innovation.
Frequently Asked Questions About California Pizza and Pizza Tools
1. What is on the California Pizza Kitchen menu?
The California Pizza Kitchen (CPK) menu features an eclectic mix of globally inspired pizzas, pasta dishes, and salads. Signature items include BBQ Chicken Pizza, Thai Chicken Pizza, and California Veggie Pizza, each offering fresh, high-quality ingredients. Their menu reflects the core of California pizza—creative, bold, and ingredient-driven.
2. What is California Pizza Kitchen?
California Pizza Kitchen is a well-known casual restaurant brand that played a major role in popularizing innovative, upscale pizzas that break away from traditional styles and flavors. Originating in Beverly Hills, CPK gained fame for its creative approach to pizza—blending international flavors with fresh, locally sourced California ingredients for a unique culinary experience. They helped define the California-style pizza movement by moving beyond red sauce and mozzarella.
3. Is California Kitchen Pizza the same as California-style pizza?
Not quite. California Kitchen Pizza refers specifically to dishes created by the California Pizza Kitchen brand, while California-style pizza is a broader culinary approach—known for its inventive toppings, artisan crust, and fresh, local ingredients that reflect West Coast creativity.
4. What does a mixer dough machine do?
A mixer dough machine automates the kneading process, making it easier to achieve a consistent texture and proper gluten development in your pizza dough. It streamlines the dough-making process and promotes uniform rising—essential for creating the soft, airy crust that sets a true California pizza apart.
5. What is a dough sheeter used for?
A dough sheeter presses pizza dough into a uniform sheet, allowing both home chefs and professionals to maintain consistent thickness for even baking and optimal crust texture. It’s perfect for California-style crusts, which rely on an even bake and thin, crisp base to highlight bold toppings.
6. What can I make with a crescent dough sheet?
Crescent dough sheets are great for more than just croissants. You can use them to create flatbreads, pizza tarts, pinwheels, and even dessert-style pizzas. Their flaky texture and fast bake time make them an ideal shortcut for creative California pizza variations.
7. What is a pizza peel and how do I use it?
A pizza peel is a flat, paddle-like utensil designed to transfer uncooked pizzas into a hot oven and safely remove them once fully baked. It prevents the crust from sticking, helps retain the pizza’s shape, and reduces the risk of burns. When making California pizza, a wooden peel works best for smoothly sliding raw dough into the oven, while a metal peel offers better control for removing the finished pie without damaging the crust.
What’s the best way to sharpen a pizza cutter blade?
To keep your pizza cutter in top shape, sharpen the blade using a whetstone, honing rod, or a handheld knife sharpener. Regular maintenance ensures clean, effortless slicing—especially important for preserving delicate California-style crusts and layered toppings.
9. How do I shred cheese without a grater?
You can use a vegetable peeler for ribbon-like slices, a food processor with a shred attachment, or a sharp knife to cut thin matchsticks. These methods work well for prepping cheese toppings on California pizza when a cheese grater isn’t available.
10. What’s the difference between grated and shredded Parmesan cheese?
Grated Parmesan is finer and powdery—ideal for dusting finished pizzas—while shredded Parmesan consists of larger, coarser pieces that melt into gooey pockets. Both work well on California pizza, depending on whether you’re baking it in or using it as a finishing touch.
Conclusion: Turn Your Kitchen Into a California Pizza Masterpiece
Creating exceptional California pizza at home isn’t just about following a recipe—it’s about embracing a philosophy: bold ingredients, fresh flavors, and the freedom to break pizza rules. Whether you’re crafting classic BBQ chicken slices, loading arugula and goat cheese onto a flaky crescent base, or testing tools like a mixer dough, dough sheeter, or pizza peel, every step is a chance to elevate your pizza game.
From mastering artisan dough to shredding cheese creatively without a cheese grater, this guide has given you the tools, techniques, and inspiration to build gourmet-style pizzas with confidence. You don’t need a commercial kitchen—you just need the right tools, high-quality ingredients, and a little California spirit.
Discover great ideas like our bruschetta appetizers for side pairings, or pair your pizza with this caramel macchiato recipe for the perfect finish to pizza night.